

I was in the mood for something nice and girly today. I had been rocking midnight colored nails for the last three days and it just wasn't spring enough. And if I can't bring the spring outside (the weather has been horrid. I want my pretty sunny days!) I'll just bring it to my nails.
It's the first time I tried a gradient design like this, and I think it came out quite nice. Although my technique definitely requires some practice. But practice makes perfect and that's what I strive for!
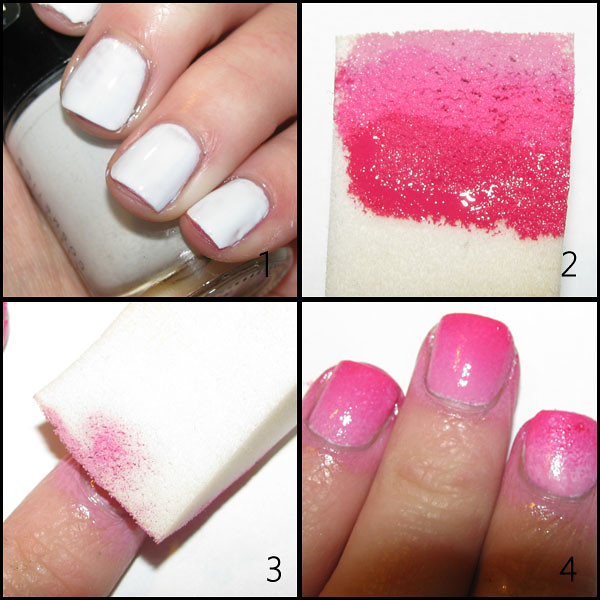
Step 1: Paint your nails a solid white color. I used two coats of Catrice's Snow Motion, but any white polish will do. I suggest you use whatever you have lying around.
Step 2: Grab a cosmetic spong and paint three different pink nail polishes in one stripe on the sponge. Make sure this isn't too big. Roughly the size of your nail should do.
3. Press the sponge onto your nail a few times to create the gradient effect.
4. It should look something like this, depending on the colors you used. Just take a q-tip dipped in polish remover to clean up around your nail and your new manicure design is done! Just add your top coat of choice et voila!

polishes used
Catrice Snow Motion
ANNY Summer Dream
OPI Short's Story
Catrice Pinky And The Brain
how pretty! love it!
ReplyDeleteWhere do you live? All those pretty nails tutorials!
ReplyDeleteYou can do mine:-).
xx
This si so pretty and looks easy. I am going to try it out soon. Thanks for the tutorial.
ReplyDelete