

I put together a short and sweet nail tutorial, as this design is incredibly easy, everyone can do it. I mean, if I can, anyone can. The shades I have used are between the brackets but of course you are free to substitute these for any other shades you own or prefer.
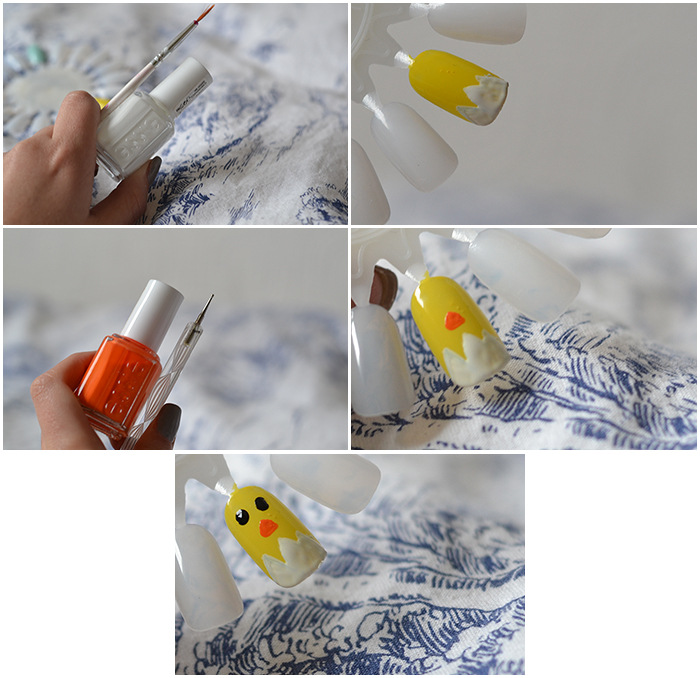
1. Paint one of your nails an opaque yellow shade (NYC Lexington Yellow) 2. Grab a white polish and a nail brush, or a white nail art pen/striper (Essie Blanc) 3. Create a zig zag edge on the yellow nail and fill it in with the white shade, this creates the resemblance of a cracked egg 4. Take a good opaque orange and a relatively small dotting tool 5. Create a small triangle as the chick's beak 6. With a black polish and another dotting tool create the chick's eyes. And then you're done.
You can repeat this on the rest of your nails or do like me and use a few springtime appropriate shades. A few simple dots in a contrasting color up the cuteness even further, if that's your thing. That's all, super easy and ridiculously cute. I'm ready for a big breakfast and a nice weekend with friends and family.
Happy easter everyone!

BLOGLOVIN' | TWITTER | FACEBOOK
No comments:
Post a Comment